Briefing
Today I present an AAR for a scenario which comes from the realm of fiction. The 2013 Christmas Special includes a very interesting mission where a U-boat landing party lands on the Southern Coast of England in order to pick up a German agent who has been captured by British militia in the area. The Agent, code name "Haddock," is the objective of the German landing party. Yet, the Germans are not quite sure where he is being held so they have to wait for Agent "Salmon," a British traitor, to come disclose the location where agent Haddock is being held.

The Germans start with 3 patrol markers, all at the Boat House, meanwhile the British get 4 at the Pointhouse, and 1 at Headland Point. Agent Salmon starts in the center of Traitors field and during each German phase gets activated automatically moving towards the German troops. What makes the scenario very interesting is that Germans can't move away from a defensive position near their jump off points until Salmon either reaches them, disclosing the location of the captured Agent Haddock, or if he dies (it is assumed they would be able to deduce where he is being held thereafter). The Germans win if they can rescue Haddock, but are pressed on time as nearby British regulars are making their way as reinforcements.
The German crew can be organised as the player desires, the following are available:
Kapitanleutnant Möller, Ranking Senior Leader (pistol)
Leutnant sur Zee Kollwitz, Senior Leader (MP38)
Oberbootsmann Wilmann, Junior Leader (MP38)
Bootsmanner Schiffer, Junior Leader (MP38)
Twenty‐four Matrosen (2 MG-34, 22 Rifles)
5 command dice are available to the Germans and they rolled a force moral of 9. They will use an adapted force moral chart, being relatively poor ground troops they will use chart B (from an adapted force moral loss of dice chart also present in the 2013 Christmas Special).

The British field the Homeguard "Witchford" platoon, with 5 command dice, and also rolled force moral also 9. Their composition is less flexible and is as follows:
Lieutenant Drummond, Senior Leader, pistol.
Sergeant Hannay, Senior Leader
LMG Team
Lewis Gun with three Crew (firepower 4 dice, reduced then to 3)
Section One – At Point House
Corporal Claridge, Junior Leader. Thompson SMG
Seven riflemen
Section Two
Corporal McCarthy, Junior Leader. Rifle
Seven riflemen, three of whom are at Headland Point on look‐out duty.
Section Three
Corporal Evans, Junior Leader. Thompson SMG
Seven Riflemen
Disclaimer: for the sake of this little scenario I have will simply be using my standard German and British troops, while I have looked into buying British Homeguard and a full landing party I think the time effort and cost is not worth it for such a small scenario.
AAR

The result after the patrol phase, the Germans are able to get in a nice position near Agent Salmon in the orchard on the Southern edge, meanwhile the British are able to deploy near the bunker which overlooks most of the table.
The Germans decide to split their crew into 2 main fireteams ahead of the fight
- Bootsmanner Shiffer leads an 8 man MG34 support section, made up of 2 MG-34 teams with 3 Crew and 1 rifleman each.
- Oberbootsmann Wilmann leads the assault section, composed of 11 riflemen.
- Five men without any leader are left aside to make a small scout/reserve section.
-------------------> Battle Begins
The first german phase sees Wilmann's assault team deploy inside of the orchard in order to stay in cover from the British men in Point House, and on overwatch in case the British rush forward. meanwhile the traitorous agent Salmon begins to make his way towards the German troops.

The British respond by deploying the Lewis gun team inside of Point House and fire down on salmon who is in the middle of the field, along with some support from the riflemen, Salmon meets his end in the rightly named "Traitor's field." Although the Germans are unsure where Agent Haddock is hidden, the British firing from Point House has given the position away. Oberbootssmanner Wilmann figures the gunshots are coming from the house at the intersection and assumes Haddock is held within.

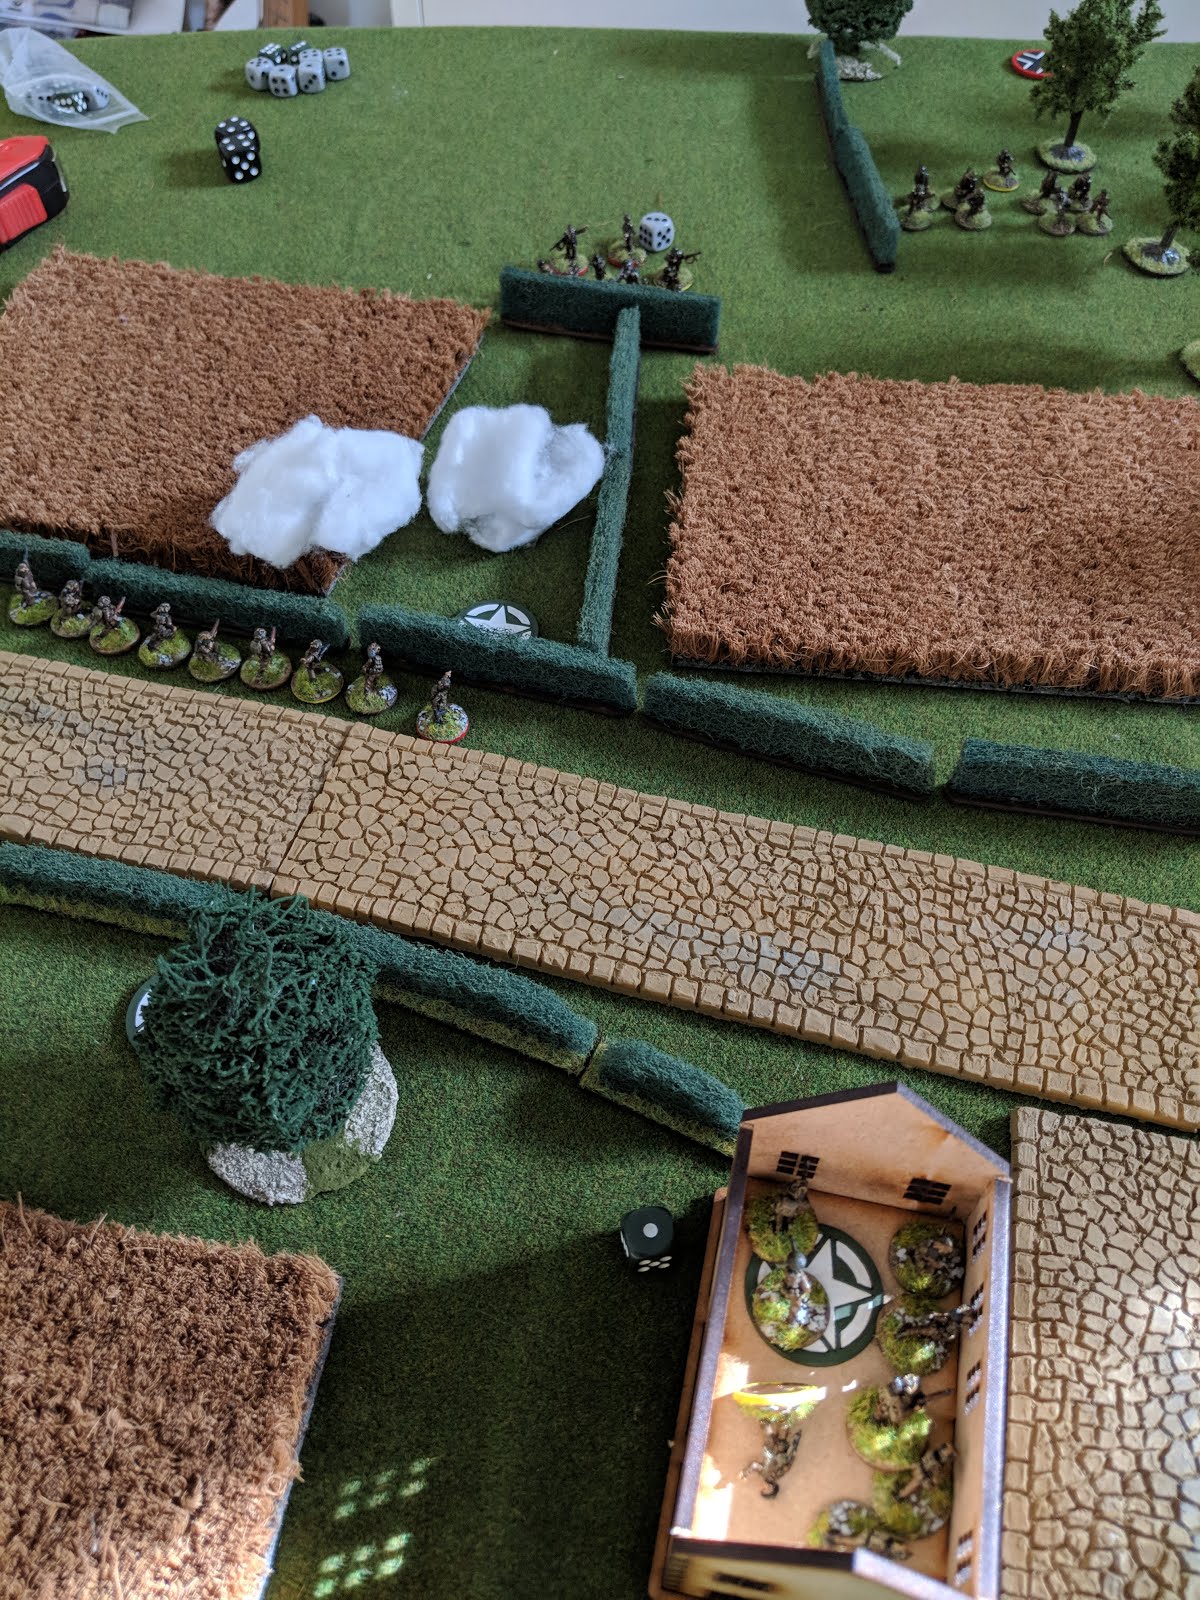
On the next phase Leutnant sur Zee Kollwitz, joins the battle and makes the assault team run at the double towards closer to the house, threatening a British Jump-off point. He also orders two smoke grenades to be thrown to cover the advance (they suffer 1 shock by running, not displayed on picture below). The LMG support section deploys into the open and Bootsmanner Shiffer orders both MG-34's to lay down some covering fire on the house.
 |
| Kollwitz joins the fray |
At a critical juncture in the battle the British roll a triple 6, giving them a double phase and ending the turn. In the first phase they deploy Corporal Evans' section who orders them to Fire Five Rounds Rapid! As the turn ends, and the smoke clears, Sergeant Hannay jumps into the battle and orders the British to unleash some more lead into the Germans trapped behind the hedge. The Germans suffer 5 shock and 2 dead.
 |
| Sergeant Hannay directs some accurate fire onto the Germans |
Nevertheless, the Germans are not quite done, Bootsmanner Shiffer orders both MG-34's to fire at the house. The deadly fire kills 3 riflemen, and knocks out Corporal Claridge, in addition to also causing 1 shock. Kapitanleutnant Möller, also joins the fight and runs off to help the assault section ordering them to throw 2 new smoke grenades. Leutnant sur Zee Kollwitz calms the troops down and removes 3 shock. Not pictured below is also the deployment of the small German reserve section who deploy on the flank.
 |
| Corporal Claridge is knocked out |
British Lieutenant Drummond makes his way into the battle to take over command of Point House following Corporal Claridge's injury, and directs fire against the German's behind the hedge- Simultaneously, Corporal Evans orders his men to fire at the same target. Miraculously, and mostly due to the smoke, the Germans suffer no casualties or shock! Meanwhile, McCarthy's 4 man section is still being held back in reserve.

The German support team continues to fire at the British in the house causing 2 shock, killing 1 more rifleman along with Lieutenant Drummond who had just joined the battle. The British suffer a huge blow to their force moral (-2, now at 7), and are leaderless inside of Point House. Inspired by the success of the other sailors, the assault squad is firstly rallied by Moller (reducing their shock to 0), and then ordered to charge forward through the smoke and assault the British by Boostmanner Schiffer (No Handgranaten! was used as these are not trained infantry).
 |
| Boostmanner Schiffer leads the charge! |
The close combat is deadly, the Brits role a whopping 25 dice! They kill 11, and cause 7 shock. The Germans roll 21 dice! They manage to kill 10 men and caused 1 shock, effectively wiping out the section and killing both the Senior and Junior leader. The British are forced to roll multiple Bad Things Happen, which see their force moral drop all the way down to 2 (-5). The Brits lose 3 command dice and 1 JoP (inside of Point House)
The sole German survivor is a lone rifleman, who while having survived the bloody encounter breaks, with 8 shock to his name. Tragically, both Senior leaders, Moller and Kollwitz, along with Schiffer all perish in the deadly assault. The German Bad Things Happen rolls drop the German force moral from 9 all the way down to 2 (-7). The Germans, using the modified force moral effects posted earlier, lose 3 command dice in addition to 1 of their JoP (not really relevant as all troops are deployed).
 |
| Battlefield empties... |
In the subsequent phase the British roll 2x 4's, and a 2. With no Senior leaders left they deploy their last section lead by Corporal McCarthy near Point House on overwatch. The Germans are only able to activate 1 team (rolling a 4 and 1), an choose to fire the MG-34 at the British inside of Point House causing one Shock on the Lewis gun team.
The next British phase allows them to activate the rifle section and fire at the German support squad, causing no damage. On the other hand, the Germans roll a 3 and are finally able to unleash both Mg-34's against the house killing 1 man on the Lewis Gun team and causing some shock.

The Next British phase is of no use as a 4,4,5 are rolled. The Germans roll a 2 and try to finish off the Lewis Gun team, hoping to break the British force moral. While they do no damage, they pile on 3 more stress on the lone gunner which makes him break and lowers the British force moral down to 1.
 |
| The Lewis gunner runs off |
The British use the next phase to get the rifle team in the house down to the bottom floor and away from the deadly fire of the MG-34's(while I love the TT Combat Houses they sadly can't open multiple foors, so they are just placed near the windows). Meanwhile the Germans charge forwards, while still not in full view of the British.

The British phase sees them activate the lone 3 men in the bunker (I must add that this is the first time they were activated all game), and fire at the Germans in the field causing 1 shock. Dice remain a limiting factor for the British. The Germans respond by pushing forwards once again and removing 1 shock. The British on overwatch fire but only manage to inflict 2 shock.
 |
| Wilmann's section gets close |
The next phase proves to be another all or nothing by the Germans, with time nearly out as British reinforcements are dangerously close, Oberbootsmann Wilmann, takes off 1 shock and orders another Assault! The British roll 16 dice! Shockingly they only manage 2 kills and 1 shock. However, Wilmann is lightly wounded which brings the German moral down to 1!
On the other hand, the Germans roll 12 dice! Unlike the British they are more successful, managing to kill 5 and cause 2 shock. The team in the house is reduced to 2 men and pinned, while the other section suffers 2 dead and McCarthy is lightly wounded, the Bad Things Happen roll drops the force moral to 0. The British surrender, and Agent Haddock is retrieved by Wilmann and his squad, but at what cost...

Total casualty count:
-British: 16 riflemen, 1 Junior leader, 2 Senior leaders.
-German: 11 riflemen, 1 Junior leader, 2 Senior leaders.----------------------------------------------------------------------------------------------------------------------------------------------------------------------------------------------------------------------------------------------------
Concluding thoughts
I want to start by saying that this was really an awesome scenario! I think this is the most fun I have had playing Chain of Command so far. While it would have been amazing to be able to run this scenario with some real British homeguard figures and some U-boat landing crew, I think that its still a great scenario to run usomg proxies. I really recommend people try this one out, its a quick and creative little scenario.
In terms of the actual action it was definitely a mistake to charge the assault team, but as time was a factor I thought it could have crushed British force moral and opened the way for a quick victory. On the other hand it just made it longer and more bloody, forcing a desperate final assault. While the 3 riflemen in the bunker played essentially no active role, they did didn't allow the Germans to surround the house from multiple flanks which was quite crucial.


